How to Guide: Removing Wallpaper (Quickly & Easily!)
Are you ready to ditch that tired, dated wallpaper in your home? Is it time to embrace the new? Learn how to remove any existing wallpaper quickly and easily from walls & ceilings, without the need for a steamer and start transforming your home with Home Flair Decor.

We have all been stuck in the same dilemma, contemplating whether or not to remove any existing wallpaper from our walls before redecorating? We know what you might be thinking - it could save a lot of time to just hang over it rather than stripping off the old wallpaper. But without good preparation, experts agree that your results will vary and may leave you disappointed, frustrated and out of pocket. What you may save in time today, may not look how you want it to tomorrow!
It would of course save time to overhang what’s up already, but the simple truth is it is never ideal to apply new wallpaper over old wallpaper. Don’t think that you’ll need a professional to complete this task either, for most spaces it's a DIY project that you can complete easily within a day. No matter what type of wallpaper you are going to remove and from where let us show you how to remove it as quickly and painlessly as possible
Why you should strip walls before wallpapering…
No matter how “good” you believe the condition of any existing wallpaper is, you'll never know how it will react to the moisture, weight and tension applied by hanging more wallpaper over the top of it, or what issues may be lurking underneath.
Stripping existing wallpapers off prior to hanging new wallpaper or before painting removes the risk of failure and poor results, this also gives you the chance to check the condition of your walls and ceilings for any cracks, imperfections or anything untoward that has been happening out of sight.
When to decide it's the right time to strip and redecorate?
Is the wallpaper peeling away from the wall? Can you see any loose corners or bubbles?
Is the wallpaper really quite tired or fatigued? With marks, stains, scuffs or tears?
Is it patterned and if so is it out of fashion, outdated or are you just fed up of it?
These are all sure-fire signs that you must remove the wallpaper before applying a new wallcovering or painting.

Clear The Room
Remove as much furniture and belongings from the room as you can to give you the space you’ll need. If you’ve got large items, move them to into the centre of the room or to the opposite side of the room where space is limited.
Protect What Remains
Protect the floor or carpets along with any remaining furniture with dust sheets, these can always be taped into place to stop them from moving.
Turn Off The Power
Turn off all electricity in the room, water and electricity do not mix. Ensure this is off prior to stripping around electrical switches, sockets and light fittings.
Preparations
Gather up what you need before you make a start, you’ll need
- Wear your decorating clothes
- Empty box or Waste/Bin bags
- Bucket / Garden or pressure sprayer
- Block / Wall Brush / Sponge
- Towel / Rags
- Stripping Knife / Scraper
- Wallpaper stripping concentrate
- Plenty of hot water
- Rubber gloves
- Ladder / Steps
- Screwdriver
What to expect
Wallpapers are most commonly produced using multiple layers which are then bonded together, these layers include a base layer (similar to a lining paper), a printed pattern layer and may also include a hot-embossed vinyl, solid sculptured vinyl, wood chips or another washable coating.
The first task will be to remove these top layers that are often water resistant, textured and may have even been painted over, this can often be a quick and very satisfying process! Next will come the real wallpaper stripping so please read on.
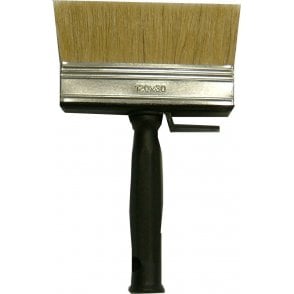

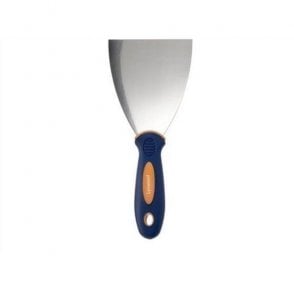
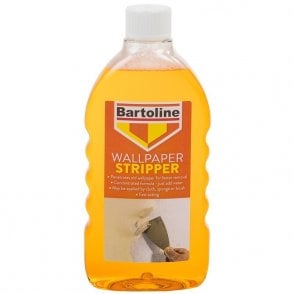

Here’s our easy step-by-step guide to stripping wallpaper...
1. Start peeling back the wallpaper at a corner near the ceiling, under the light switch or close to a radiator - this is where the paper tends to be looser due to wear and tear or heat breakdown of the wallpaper adhesive used initially.
You may need to loosen the screws on any electrical switches or sockets to remove the wallpaper that surrounds them and is partially covered by them.
2. Lift from the seam (where each piece of wallpaper was joined) and pull away from the wall. You may find the upper layer peels away in large segments or even full lengths at a time. It is likely that this will leave the backing/base layer behind, a few areas may be loose and come away complete.
If you are removing a non-woven (paste the wallpaper) you may find that the entire wallcovering comes away complete, one length at a time.
Dispose of this into the empty box or waste bags, you cannot recycle this material as of writing this guide and it must not be mixed with any paper recycling you collect.
3. Once all the top layer has been removed it is time to work on the base layer (substrate). We are trying to soften and swell the wallpaper adhesive which was originally applied when this wallpaper was hung, during this process the substrate will also swell and become supple.
Generously apply the warm soapy solution (mixed to the correct dilution) to the walls with a sponge, brush or sprayer in an even fashion, the bubbles created in this process slow the flow of moisture down your walls.
Keep safe by drying any splashing from the flooring and using a ladder to reach any high areas.
4. Allow a good amount of time to pass, up to 10 minutes, before returning to the wall. This will allow the moisture to soak through the substrate and to swell the original wallpaper adhesive, you should see a colour change in the substrate as the saturation happens.
Upon returning to the wall, check the softness and colour of the substrate. A small test of scraping the surface with a finger nail will show you if this area is ready to remove or if it has dried out upon return. If the scrape was difficult or felt dry, re-apply the solution and wait a little less time before returning.
Don't be tempted to move onto a second wall unless it is very small, you really need to concentrate on saturating and stripping one wall at a time.
5. Now it’s time to use a stripping knife / scraper, hold this scraper as flat to the wall as is comfortable and begin scraping the soft paper substrate off a section at a time, from a seam or where bare plaster is visible. If you find you are struggling, an additional application of soapy water may be required to soften the existing adhesive further.
Be careful not to damage your walls by being too aggressive with the scraper. If you do see that scars, scrapes and abrasions have been caused during this process then a little wall filler will fix you up later but try to apply less pressure and hold the scraper flatter to the wall for now.
Now, this is a case of rinse and repeat, continue to soak the substrate remaining on your walls until all are free of any wallpaper. Once completed, wipe over the wall with a damp sponge until it’s smooth and clean, this will help remove the majority of any leftover adhesive that remained on the plaster.
If there are any stubborn leftover areas of paste or substrate that you’re struggling to remove, scrape off as much as you can and allow the area to dry. You’ll now be able to use some sanding paper or a mechanical sander to remove the final difficult spots along with any excess/stubborn paste residue.
6. Finally, once you've complete all the walls you wish to strip. wipe over the walls with a damp sponge until they are smooth and clean. You really want to finish with a clean, dry and dust free surface to apply your new wallpaper on so this final step will give you a headstart.

So there you have it, our expert guide on how to remove wallpaper.
Remember, ALWAYS strip your walls before re-wallpapering!
Get the right tools and equipment to make this task as easy as possible for yourself, jump to our Tools & Adhesive to find everything you'll need.
You are now free to let your personality show! Check out our vast range of high quality and beautiful wallpapers from all the brands you know and some we would love to introduce you to.